Why Use WP Engine As Your WordPress Hosting Platform?
Before we get started, I wanted to give you all some insight on why WP Engine is our preferred WordPress hosting company. If you are already convinced, click here to go straight to the tutorial.
If you don’t already know, WP Engine is widely regarded as one of the leading WordPress hosting companies currently available.
One of the key advantages of using WP Engine is its focus on performance and speed. The company’s servers are optimized specifically for WordPress, resulting in faster load times and improved overall website performance. This is crucial in today’s fast-paced digital landscape, where users expect instant access to information and seamless browsing experiences. By leveraging WP Engine’s hosting infrastructure, website owners can ensure their sites deliver exceptional speed and responsiveness, leading to increased user satisfaction and engagement.
Security is another major benefit of using WP Engine. The company takes a proactive approach to protect websites from potential threats, implementing robust security measures and offering automatic updates to ensure the latest security patches are applied promptly. With WP Engine, website owners can have peace of mind knowing that their sites are safeguarded against common security vulnerabilities and potential attacks. This level of protection is particularly important for businesses that handle sensitive customer data or engage in e-commerce activities.
WP Engine also stands out for its exceptional customer support. The company offers 24/7 expert support from WordPress professionals who are well-versed in the platform’s intricacies. Whether you need assistance with technical issues, plugin recommendations, or general inquiries, the WP Engine support team is readily available to provide prompt and knowledgeable assistance. This level of support is invaluable, especially for those who may not have extensive technical expertise or who want to focus on growing their websites without worrying about the underlying hosting infrastructure.
Additionally, WP Engine offers advanced features and tools that enhance the WordPress experience. The company provides a user-friendly dashboard that allows website owners to manage their sites effectively, including features like one-click staging environments for testing site changes, automated backups, and easy scalability to accommodate traffic spikes. WP Engine also integrates seamlessly with popular WordPress plugins and offers a range of developer-friendly tools, making it an ideal choice for both non-technical users and experienced developers.
Lastly, WP Engine offers a range of hosting plans to suit different needs and budgets. From entry-level plans suitable for small personal blogs to enterprise-grade solutions for high-traffic websites, WP Engine provides scalable options that can grow alongside your online presence. This flexibility allows website owners to choose the plan that best aligns with their needs, ensuring they have access to the necessary resources without overspending or being limited by their hosting provider.
All of this to say, WP Engine is an amazing hosting company. Five stars. We highly recommend.
How to Set Up Your WordPress Website Hosting on WPEngine
So now that you are ready to get started with WP Engine, you might be asking yourself how do I get started? Well, fear not, below you’ll find a text and video tutorial that will walk you through the process of setting up WordPress hosting on WP Engine.
Step 1: Navigate to WPEngine.com
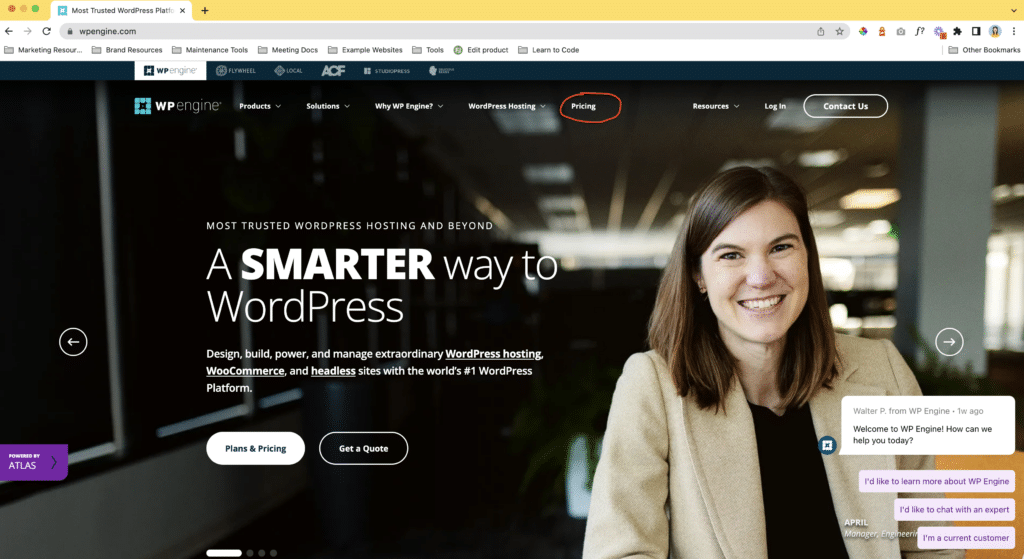
First things first head on over to WPEngine.com and select pricing from the top navigation menu.

Step 2: Decide Which WordPress Hosting Plan You Want
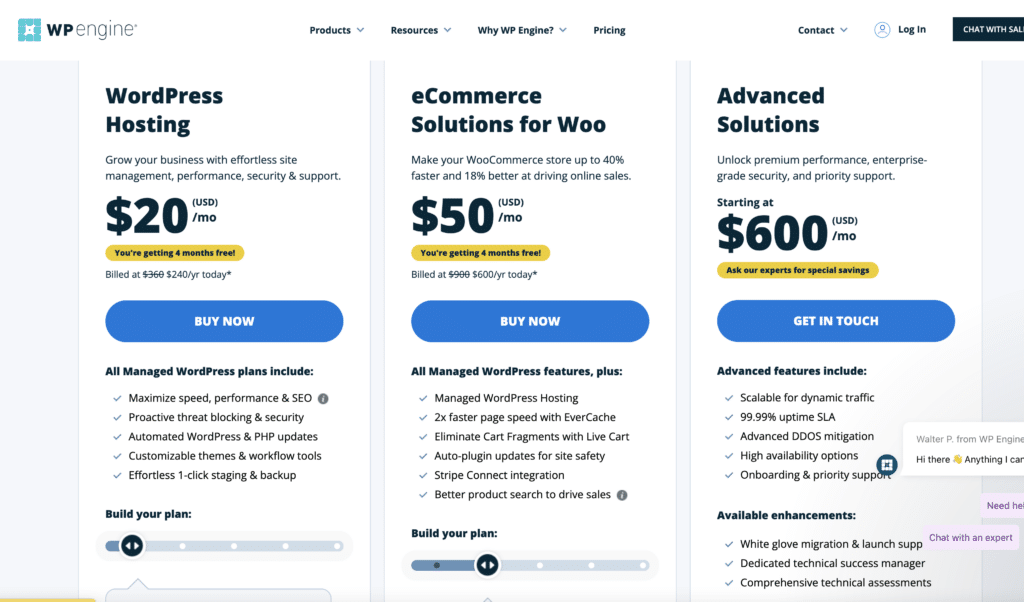
WP Engine offers three different levels of WordPress hosting and each of those has 4-5 different levels depending on how many sites you have. For most companies, the basic WordPress Hosting Startup solution will work just fine, however if you are running a high traffic WooCommerce site, then I recommend the eCommerce Solutions for Woo package.
All of these packages offer 24/7 support, free migration if you’re hosted on another platform currently, daily and on demand backups, a free SSL certification, one-lick staging and enhanced security features.
Once you decide which package you want, click “BUY NOW”.

Step 3: Decide if you want an Annual or Monthly Subscription
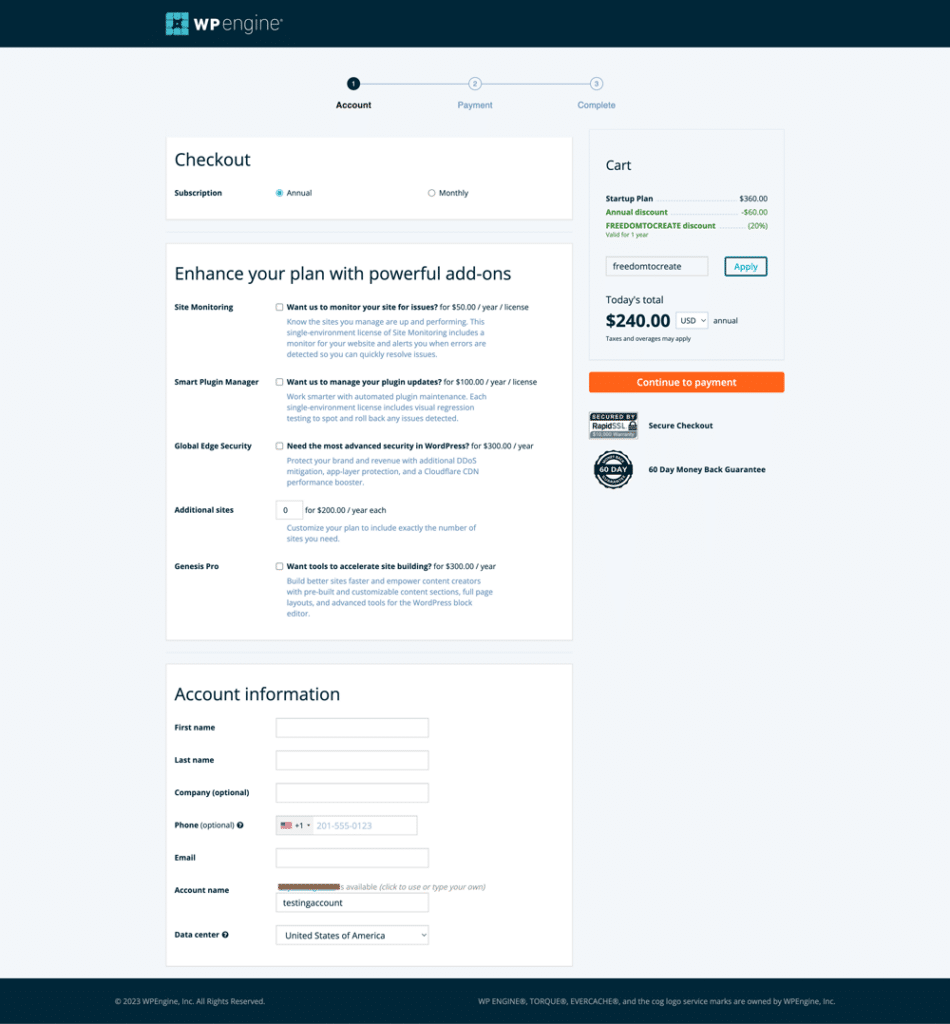
On WP Engine, you almost always get 20% off of your first purchase, whether that be annual or monthly. I always sign up for the full year, because I know I will be sticking with WP Engine, but if you want to “try it out” first, you’ll still save a few dollars on that first month.
You can also add on additional site monitoring, smart plugin manager, global edge security and additional sites at this time. These our items I recommend if you’ll be doing your website maintenance yourself and are not a website professional, but they are not required (and aren’t even offered by most other hosting companies).
Once you decide on your package length, and add-ons, fill out the account information and continue on over to payment. Once you complete payment, you will need to create a password and login.

Step 4: Create Your New WordPress Website Environment
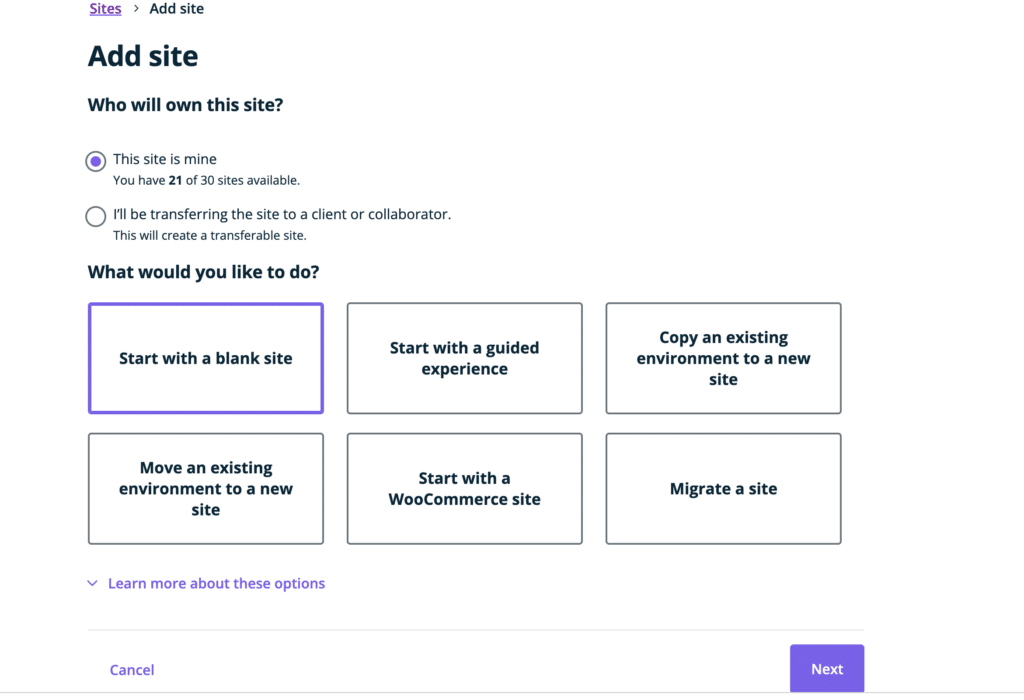
Once you log back into your account, you will be presented with your WPEngine Dashboard. In order to get started, you’ll want to click on the purple Add Site button that’s in the upper right hand of the screen.

Step 5: Set Up Your Site Name and First Environment in WPEngine
The first thing you’ll need to do is add a site name. I recommend using something that is similar to your project name like for Firefly Web Studio, you could use fireflyweb or ffws. Once you add your site name, the environment name will automatically populate for you. You can change the environment name, assuming the one you change it to is not currently in use.
When starting a new site, I like to use a production (live) site, but you can also use a staging site or development site to build your originally site on. It won’t make a difference for starting out.
Once you’ve picked your site and environment name, click “Add site”. Now your environment is in process and you’ll be notified once it is complete.

Step 6: Accessing Your WordPress Dashboard
Once your environment is complete you will receive a confirmation email and it will be listed under “All sites”. In order to access your WordPress site, just click on the WP Admin, and it will take you directly to your WordPress dashboard.

And that’s it, your WordPress Hosting is successfully set up on WP Engine, and your initial WordPress is now complete. Now it’s time to start building your website. Firefly Web Studio highly recommends using Elementor as your WordPress builder. Click here to see our top reasons for using Elementor to design and develop your site.


